
Alright folks...it's been an interesting week around these parts! The weather has made me want to do things outside (like the days when it was 84°) and also things inside (like yesterday when it was rainy and only 50°). So it's really got me thinking about some projects I'd like to attempt...or see others attempt anyway. Here are some fun DIY projects that have caught my eye lately (and can all be done in a weekend).
 |
| DIY Pressed Flower iPhone case >> directions here |
So many times I'm looking at cases for my phone and I'm never quite satisfied. I can find some that I like, but none that really scream "LOOK AT ME!" But look at this lovely case...it's so fresh (even though the flowers are definitely dead) and light looking. And you could do it with any other kind of phone that has a purchasable white case. It uses dried flowers (either store bought or press your own), glue, and epoxy. The directions are straightforward and easy to follow, making this project totally doable!.
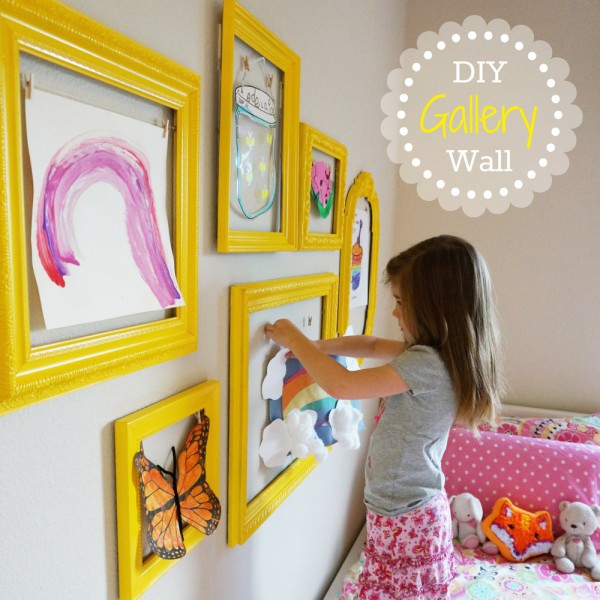 |
| directions >> here |
This is one of those super easy things that is entirely functional and will look great! Aria has a TON of artwork I could put up somewhere, but I have no where to hang them. BUT...if we made this gallery wall with these picture frames + clothespins, we could hang everything up and she could change out the pictures when she's ready. Buy frames (any size, any color, any shape), dismantle the hardware included and remove glass, prime and paint (if you want), add eye hooks to the back, thread mini clothespins onto string (of any kind), and attach to wall. Because the clothespins are threaded onto the string, they can move freely to accommodate any size art. This is such a great idea!
 |
| Chunky shelves >> directions here |
Our downstairs bathroom is TINY and the layout only allows for decoration to be placed on one wall: the wall behind the toilet. I don't just want to hang a picture there, but I don't want one of those over-the-toilet cabinets, either. These shelves, though...they'd be wonderful! I could paint them the same white as the wood trim in our house and put some things on them, like a vase of flowers, a painting, and some other things that I could change out whenever I wanted. I think these would be great...and it only uses wood, screws, a drill, and wood glue. And of course the standard wood-working rule: measure twice, cut once!
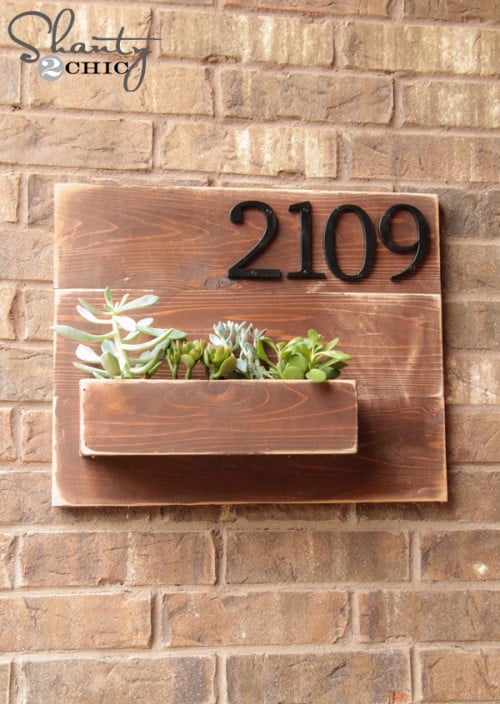 |
| Address Number Wall Planter >> directions here |
As a new homeowner (yes, I've been in my house for 2 years, but I still feel like I'm new at it), this one is WAAAY out of my comfort zone for DIY. It involves such things as a miter saw and something called "pocket holes" which look like a great way to drill a hole diagonally through your just-cut board and have to start all over because, as it turns out, you weren't supposed to go all the way through. Also, I don't think I have anywhere on my house to put this (not to mention, how the hell do you attach this, or anything for that matter, to a brick wall?!) BUT....I love this, (though I might paint the wood a nice bright color and then seal it so it won't fade so much...just to look a little more artsy). Anyway...if you attempt this one, good luck!!
 |
| Wooden Headboard, complete with shelves >> directions here |
I HATE our current headboard. I mean, absolutely HATE it. First of all, it wasn't the one we picked out. The people at the store ordered us the wrong one. Even though it was wrong, we decided it wasn't worth the hassle to try to return, so we just stuck with it. Second of all, it has cutouts, so you can't lean up against it without propping 3 pillows behind you, and even then it feels goofy because the pillows start to fall through the cutouts. It's ridiculous. I've always dreamed of a nice, comfy, padded headboard that I can rest on without being uncomfortable, and I know there are plenty of DIY instructions for those, too...but I just love this one, with the attached lights and built in shelves. I would, however, do it a little differently and have it going all the way to the floor with more shelves. And of course whatever frame we found for the bed would need to be good and high, that's a must! If I had my plans laid out and measured, I could have Home Depot cut all the wood for me in the sizes that I need and then I would just have to worry about staining and assembling. I'd have to use a drill...but that's OK, I'm sure I can figure it out! (Or...my darling husband could get on the ball with this and help me out!)
I hope you have a productive (yet relaxing) weekend!
No comments:
Post a Comment